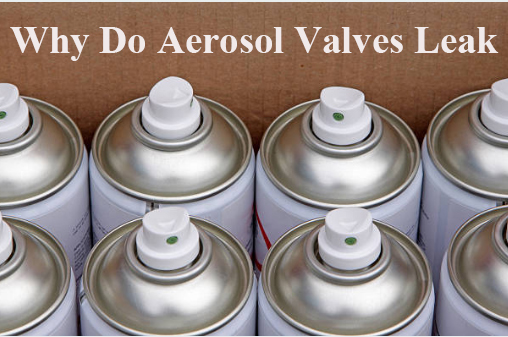
You might see an aerosol valve leak if the can loses pressure or the spray gets weak. Most leaks happen because of sealing problems, mistakes in making the can, or using it the wrong way. Even the best companies have some aerosol cans that do not work right. The chart below shows leaks can go up if quality gets worse or machines get old.
Knowing why an aerosol leaks can help you stay safe and make your products last longer.
Key Takeaways
Aerosol valve leaks can happen for many reasons. Worn gaskets, bad crimping, rust, or dirt inside the valve can cause leaks. Check and clean valves, seals, and gaskets often. This helps you find leaks early. It also keeps cans working well. Store aerosol cans in cool, dry places. Keep them away from heat and sunlight. This stops rust and keeps seals from getting damaged. Use easy tests to find leaks. Try soapy water or listen for a hissing sound. This helps you find leaks before they get worse. Replace or throw away cans with rust, damage, or leaks. This keeps you safe and helps the environment.
Causes of Aerosol Valve Leak
Aerosol cans can leak for many reasons. It is important to know these causes. This helps keep your products safe and working. Here are the main reasons why an aerosol valve leak happens.
Gasket and Seal Failure
Gaskets and seals keep aerosol cans airtight. If a gasket fails, leaks can happen. The stem gasket is often the weak spot. It faces harsh chemicals and temperature changes. It also gets used many times. If the gasket gets soft, cracks, or hardens, it cannot seal well. Sometimes, the formula inside the can changes. It may react with the gasket material. This can make the gasket swell or shrink. That leads to leaks. Companies buy stem gaskets from different places. So, the quality is not always the same. Leaks can happen if the gasket does not fit or wears out. Regular testing and picking good materials help stop these problems.
Tip: If a can does not spray or loses pressure fast, check the gasket first.
Improper Crimping
Crimping seals the valve to the can. If crimping goes wrong, leaks can happen. Crimping errors happen if the machine uses too much or too little pressure. If the parts are not lined up, leaks can start. Dirt or debris in the crimping area makes the seal weak. Checking and fixing crimping tools often helps stop these problems.
Here is a table showing common crimping errors and their effects:
Crimping Error or Cause | Effect on Seal or Valve Leak | Recommended Practice |
Improper Tool Settings | Uneven crimps, weak seals, leaks | Regular calibration and inspection of tools |
Contamination During Crimping | Obstructed seal, leaks | Clean handling and storage |
Environmental Factors (Temp/Humidity) | Material brittleness or softening causing leaks | Control environment and material selection |
Misalignment of Caps or Valves | Displaced liners, weak seals | Proper alignment during crimping |
Over-crimping or Excessive Force | Cracked vials or damaged seals | Adjust crimping force appropriately |
You can see the types of crimping errors that cause leaks in this chart:
Corrosion and Rust
Corrosion and rust make the metal parts weak. Over time, the can or valve can get thin, crack, or have holes. When this happens, the seal breaks and leaks start. Corrosion can also block the valve. This makes it hard to spray. Rust can mix with the contents and lower quality.
Salt water, humidity, and vibration make corrosion faster. Salt on the valve makes rust form quickly. Humid air helps rust grow. Vibration makes parts rub and wear out. This can cause leaks. You can slow corrosion by storing cans in dry, cool places. Anti-rust coatings also help.
Actuator and Stem Issues
The actuator and stem work together to release spray. If they do not fit well, leaks can happen. Size mismatches, cracks, or swelling at the connection can cause leaks. Sometimes, the actuator or stem is made poorly or gets damaged. This makes gaps where gas or liquid can escape.
The stem gasket helps control flow and sealing. If it wears out or does not fit, leaks can happen. Actuator problems like broken springs, stuck pistons, or wrong sizes can make the valve stick or leak. You may see weak spray, uneven spray, or cans losing pressure fast.
Dirt and Debris
Dirt and debris can get into the valve when making or using the can. Even small bits can stop the valve from sealing well. This causes leaks or bad spray. Cleaning the valve and its parts helps stop these problems.
Ultrasonic cleaning works well for small or tricky parts. It uses sound waves to clean dirt from hard spots. Spray washing and vacuum degreasing also help keep valves clean.
Note: Keeping aerosol cans clean and dry helps stop leaks from dirt and debris.
Aerosol valve leaks can happen for many reasons. You can lower leaks by checking gaskets and seals, making sure crimping is right, stopping rust, using good actuators and stems, and keeping things clean. This helps your aerosol cans last longer and work better.
Aerosol Valve Mechanics
How Leaks Occur
You can understand leaks better when you know how aerosol valve mechanics work. Each part in aerosol cans has a job to keep the contents inside. The stem gasket seals the valve when you do not use the can. The spring pushes the valve closed, so it stays tight. The mounting cup holds the valve to the can and forms an airtight seal. Crimping during assembly locks the valve in place. High-quality gaskets and springs help keep the seal strong. Regular testing of these parts can catch problems early. If you store aerosol cans away from heat or cold, you help the seals last longer.
Leaks happen when these parts fail. You might see a leak if the gasket cracks or shrinks. Sometimes, the spring loses strength, and the valve does not close well. If the mounting cup bends or the crimp loosens, air can escape. Poor materials or rough handling can make leaks worse. You should check aerosol cans often to spot trouble before it gets serious.
Tip: Always store aerosol cans upright and in a cool, dry place. This helps protect the seals and keeps leaks away.
Dynamic vs Static Leaks
You will find two main types of leaks in aerosol cans: dynamic and static. Dynamic leaks happen when you press the valve and the parts move. Static leaks occur when the can sits still and the valve stays closed. Both types can cause problems, but they have different causes and ways to find them.
Here is a table showing the differences:
Leak Type | Where It Happens | Common Causes | How You Find It |
Dynamic Leak | Moving valve parts | Pressure, misalignment | Spray test, listen for hiss |
Static Leak | Closed valve, can body | Gasket failure, stress | Visual check, powder test |
You can spot dynamic leaks by pressing the valve and watching for weak spray or hissing sounds. Static leaks show up as puddles, stains, or a drop in pressure when the can sits unused. You may use baby powder to trace the leak path or a UV lamp to find dye in the fluid. Some people use ultrasound tools to hear leaks in gas or liquid systems.
Aerosol valve mechanics help you understand why leaks start and how to find them. When you know the difference between dynamic and static leaks, you can keep your aerosol cans working longer and safer.
Identifying a Leaking Aerosol Can
Signs of a Leak
You can spot a leaking aerosol can by looking for a few clear signs. Sometimes, you may see rust or corrosion around the seams. This rust can create tiny holes and cause a slow pressure leak. If you notice the can feels lighter or the spray gets weak, it may have lost some contents. You might hear a faint hissing sound, which means gas escapes from the valve or nozzle. Using an aerosol can at the wrong angle can also make it leak faster.
Here are some common signs you should check:
Rust or corrosion near seams or the valve
Hissing sounds from the nozzle or base
Wet spots or stains around the can
Weak or uneven spray
The can feels lighter than before
You can also use this table to help identify problems:
Sign of Leak | Description and Indicators |
Worn or Damaged O-ring | Air leaks from the seal; look for bubbles if you use soapy water. Replace if cracked or hard. |
Cross-threaded or Loose Cap | Cap does not tighten; check for uneven seating or thread damage. |
Cracked or Faulty Housing | Small cracks or wear let air escape; performance drops. Replace the can if damaged. |
Leaking Schrader Valve | Air escapes slowly; bubble test can help. Valve may not be user-replaceable. |
Loose or Damaged Nozzle | Hissing or pressure drops; check for bubbles using soapy water. Replace if cracked or worn. |
Tip: Always inspect aerosol cans before use. Early signs of damage can help you avoid accidents.
Leak Testing Methods
You can test aerosol cans for leaks using several methods. The most common way is the hot water bath test. Place the can in hot water for a few minutes. Watch for bubbles. Bubbles mean gas escapes from a leak. Some factories use machines that heat cans quickly and check for bursts. Others store filled cans for weeks and weigh them later. If a can loses weight, it has a slow leak.
Here are the main testing methods:
Hot Water Bath Testing: Submerge the can in hot water. Look for bubbles around the valve, crimp, or seams.
Induction Heating: Heat cans on the line. Faulty cans may burst or show leaks.
Storage and Check Weighing: Store cans for up to a month. Weigh them to find slow leaks.
Pressure Readings: Check pressure before filling. This finds weak seals.
Automatic Water Bath Machines: Move cans through a water bath. Air blowers dry them after testing.
Some companies use advanced testers to find even the smallest leaks. These machines help keep aerosol products safe for everyone.
Note: If you see bubbles or hear hissing, stop using the aerosol can right away. Dispose of it safely.
Preventing and Fixing Leaks in Aerosol Cans
Storage and Handling Tips
You can help stop leaks by storing aerosol cans safely. Pick a dry room with good airflow. Keep the area locked, but let air move when needed. Store cans between 40 and 90°F. Sunlight can make the can too hot. Keep cans away from windows and heaters. Put cans in fire-safe cages if you can. Keep them away from other dangerous things. Check cans often to find damage early.
Store in dry, ventilated areas
Avoid direct sunlight and heat
Use secure, fire-resistant cages
Keep away from hazardous materials
Inspect cans for leaks or damage
Tip: Do not leave aerosol cans in cars or near heaters. Heat can make cans leak or even explode.
Maintenance and Inspection
Aerosol cans last longer if you take care of them. Check valves and seals often. Look for cracks, loose parts, or rust. Use soapy water to find leaks. Electronic leak detectors can find gas leaks. Clean inside parts and change old seals during checks. Lubricate moving parts so they do not stick. Make sure valve disks touch seats the right way. Use the right tools and follow the maker's rules.
Maintenance Task | How Often | What You Do |
Valve inspection | Every use | Check for cracks, rust, loose parts |
Leak detection | As needed | Use soap spray or detectors |
Cleaning and lubrication | Scheduled checks | Clean and lubricate moving parts |
Seal replacement | When worn | Replace gaskets, O-rings |
Routine maintenance helps you find leaks early and keeps aerosol cans safe.
When to Replace or Dispose
You should know when to throw away leaking aerosol cans. If you see rust, hear hissing, or find wet spots, get a new can right away. Never put full or leaking cans in the trash. Pressurized cans can blow up or leak bad chemicals. They can hurt soil and water. Take empty or used-up cans to a special waste site. Use safe tools to empty and depressurize cans. Follow local rules to stay safe and avoid trouble.
Replace cans showing leaks, rust, or damage
Do not throw full cans in regular trash
Take empty cans to hazardous waste sites
Use safe puncturing devices
Follow disposal rules to protect health and the environment
Throwing away cans the right way keeps you, others, and nature safe.
Conclusion
You have learned why aerosol valves can leak. Problems with gaskets, crimping, rust, and dirt can cause leaks. If you check cans early and take care of them often, you can find leaks before they get worse. Safety steps help protect you and the planet.
Keep cans away from heat and sunlight
Write labels and dates on storage containers
Put flammable and corrosive cans in different places
Clean up leaks as soon as you see them
Taking care of cans helps them last longer and stay safe. Always be gentle with aerosol cans and follow your local disposal rules.
FAQ
What should you do if your aerosol can starts leaking?
If you see or hear a leak, stop using the can. Move it to a safe place away from heat. Wear gloves if you touch it. Take it to a hazardous waste site for disposal.
Can you fix a leaking aerosol valve at home?
You cannot safely fix most leaks at home. The pressure inside makes repairs risky. It is best to replace the can. Always follow safety rules.
How long do aerosol cans usually last?
Most aerosol cans last two to three years. You should check the label for an expiration date. Store them in cool, dry places to help them last longer.
Is it safe to use a rusty aerosol can?
No, it is not safe. Rust can weaken the can. It may cause leaks or bursts. You should replace any can that shows rust.
How can you test for a slow leak in an aerosol can?
You can use soapy water. Spray it on the valve and seams. If you see bubbles, the can leaks. You can also weigh the can over time to check for slow leaks.
Test Method | What You Need | What You Look For |
Soapy Water Test | Soap, Water | Bubbles at leak spots |
Weighing | Scale | Weight loss over days |
Always handle leaking cans with care. Safety comes first!


